


Some time ago I spent an evening making these little note pad covers. I was looking for a project to use some of my scraps. I think they make nice little presents for nice persons, too.
If you like to make one, just follow the instructions.
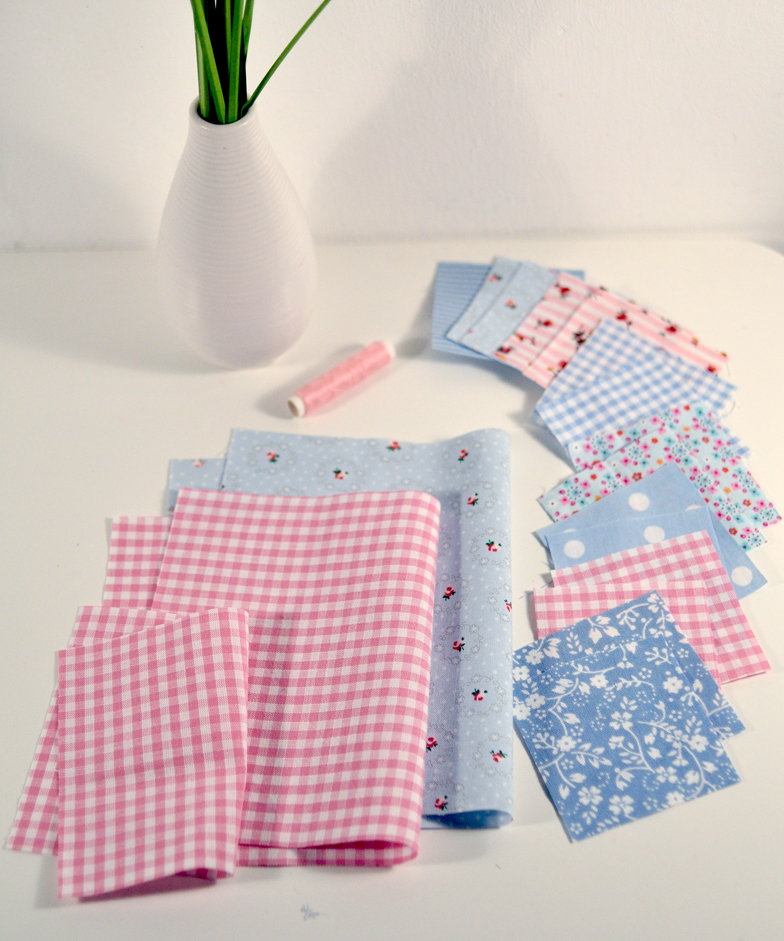
1. Buy note book, plan the size and cut the fabric
The size of the final item depends on the size of the note pad you use.
In the picture below you see the sizing I used for a note pad 10.6 x 14.7 cm ( 4.17 x 5.79").
You may need to adjust the sizing.

According to these measurements you need to cut:
- inner panel 28 x 18 cm (= 26 x 16 cm plus 1 cm seam
allowance)
- interfacing for inner panel 26 x 16 cm
- inner left pocket 16 x 11 cm
- inner right pocket 26 x 16 cm
- outer panel:final size is 28 x 18 cm. If you like a patchwork piece, cut pieces and take seam allowances into account. I cut 15 pieces 6.5 x 6.5 cm and sewed them together using 0.5 cm seam allowance. At the end I cut the edges to get a 28 x 18 cm panel.
2. Make the outer patchwork panel

Sew all those patchwork pieces together which are in one row using the right seam allowance.
You will get three strips of patchwork pieces.

Then, sew all strips together.
You will get a panel that is slightly larger than 28 x 18 cm. Square this panel up to the right size. Done.
3. Make the pockets
Pockets are made by doubling the panels, sewing around the open edges and turning them inside out. Sounds complicated but it is not. Just follow the instructions step by step:
 1. Fold each pocket panel in half - right sides facing - by bringing the short sides together:
 2. Sew around the open edges with 1 cm seam allowance and leave a gap of about 5 cm.
3. Clip corners as close to the stitching as you can go without cutting the stitching.
4. Turn pockets right sides out through the gap in the seam. Form a nice rectangle and press.

3. Make the inner panel
1. Iron the heavy interfacing onto the wrong side of your inner panel.
2. Place and pin the pockets to the inner panel. Leave enough space to the edges for the 1 cm seam allowance.
3. Top stitch around the right, bottom and left side close to the edge.

 4. Insert the note pad into the right pocket.
 Make sure it sits to the very right side.
Mark a line on the left side about 2 mm from the note pad for the division line. Take the note pad out.
5. Top stitch along this line to make the pencil pocket.
4. Sew the whole thing together
1. Place a ribbon on the side of the note pad with about 1 cm sticking out to the right side.
2. Place the outer patchwork panel on top of the inner panel - wrong side facing up - and pin in place.
3. Sew around the edge with 1 cm seam allowance and leave a gap of about 8 cm.
4. Clip corners as close to the stitching as you can go without cutting the stitching.
5. Turn the whole thing right sides out through the gap in the seam. Form a nice rectangle and press.

5. Finish
 1. Top stitch around the edge.
 2. Add a nice button.
3. Enjoy!
I hope this makes sence. If you have problems or find mistakes don't hesitate to leave a comment.